How to Assemble A PC from Scratch
28th Apr 2010 | category: Computer & Printers | Hits: 835
Things to get in place before starting:
- • Anti-static wrist strap.
- • Set of screwdrivers and pliers.
- • Piece of cloth.
- • CPU Thermal compound (recommended
- • PC components.
Tip: CPU Thermal compound is not a necessity but it is recommended to keep your CPU cool under load conditions by helping heat dissipate faster. It is a must if you intend to over clock your PC.
Note: You can find the meaning of an abbreviation at the end of this article under the heading Jargon Buster
Step 1: Installing the motherboard
Make sure you have all the components in place and a nice, clean and big enough place to work with. Put your antic-static wrist strap on to prevent your components from getting affected. Make sure your hands are clean before starting. First we will be installing the motherboard which is a piece of cake to install
- • Open the side doors of the cabinet
- • Lay the cabinet on its side
- • Put the motherboard in place
- • Drive in all the required screws
Tip: Most motherboards come with an antistatic bag. It is advisable to put the motherboard on it for some time and then remove it from the antistatic bag before placing it in the cabinet.
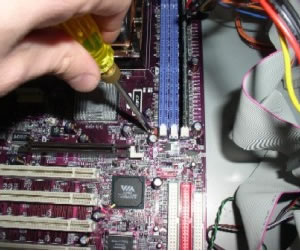 Installing the motherboard
Step 2: Installing the CPU
CPU is the heart of a computer so make sure you handle it properly and do not drop it or mishandle it. Also try not to touch the pins frequently so that they do not get dirty. Get hold of your motherboard and CPU manual. You need to place the CPU on the dotted white patch of the motherboard in a particular fashion for it to fit properly. There is a golden mark on the CPU to help you assist. Consult both your motherboard and CPU manual to see which position it fits exactly or you could also use try all the 4 positions.
- • Lift the CPU lever on the motherboard
- • Place the CPU properly on the motherboard
- • Pull down the lever to secure the CPU in place
Warning: Do not try to push the CPU into the motherboard!
Got the thermal compound? Now is the time to use it. Take small amount of it and carefully apply it on the top surface of the processor. Be careful not to put it on the neighboring parts of the motherboard. If you do so clean it immediately using the cloth.
Tip: Thermal compounds should be changed once every six months for optimal performance.
Step 3: Installing the heat sink
After installing the processor we proceed to installing the heat sink. There are different kinds of heat sinks that are bundled with the processor and each has a different way of installation. Look into your CPU manual for instructions on how to install it properly.
- • Place the heat sink on the processor
- • Put the jacks in place
- • Secure the heat sink with the lever
After this you will need to connect the cable of the heat sink on the motherboard. Again look into the motherboard manual on where to connect it and then connect it to the right port to get your heat sink in operational mode.
Step 4: Installing the RAM.
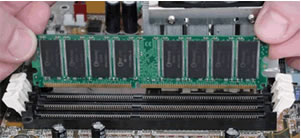 RAM.
RAM.
Installing the RAM is also an easy job. The newer RAMs ie. DDR RAMs are easy to install as you don’t have to worry about placing which side where into the slot. The older ones, SDRAMs are plagued by this problem.
If you want to use dual channel configuration then consult your manual on which slots to use to achieve that result.
- • Push down the RAM into the slot
- • Make sure the both the clips hold the RAM properly.
Step 5: Installing the power supply
We will now install the power supply as the components we install after this will require power cables to be connected to them. There is not much to be done to install a PSU.
- • Place the PSU into the cabinet
- • Put the screws in place tightly
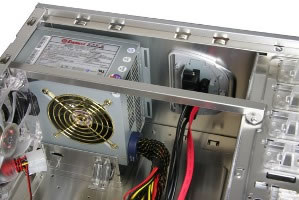 Installing the power supply
Tip: Some PSU have extra accessories that come bundled with it. Consult your PSU manual to see how to install them.
Step 6: Installing the video card
First you will need to find out whether your video card is AGP or PCI-E. AGP graphics cards have become redundant and are being phased out of the market quickly. So if you bought a spanking new card it will certainly be a PCI-E.
- • Remove the back plate on the cabinet corresponding to the graphics card
- • Push the card into the slot
- • Secure the card with a screw
- • Plug in the power connection from PSU (if required)
High-end graphics cards need dedicated power supply and if your graphics card needs one then connect the appropriate wire from PSU into the graphics card.
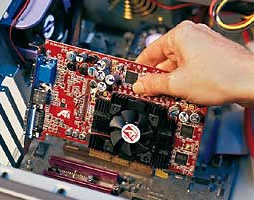 video card
Step 7: Installing the hard disk.
Hard disk is another fragile component of the computer and needs to handled carefully.
- • Place the hard drive into the bay
- • Secure the drive with screws
- • Connect the power cable from PSU
- • Connect the data cable from motherboard into the drive
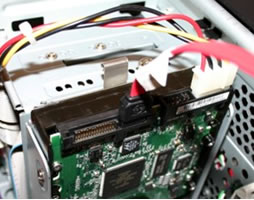 computerdisk
If your hard drive is a SATA one then connect one end of SATA cable into the motherboard and other into the SATA port on the hard disk. If your hard disk is PATA type then use the IDE cable instead of the SATA cable.
Tip: If your PSU does not support SATA power supply then you will need to get an converter which will convert your standard IDE power connector to a SATA power connector.
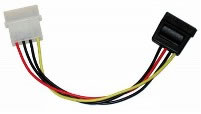 datacable
Step 8: Installing optical drive.
The installation an optical drive is exactly similar to an hard drive.
- • Place the optical drive into the bay
- • Drive in the screws
- • Connect the power cable and data cable
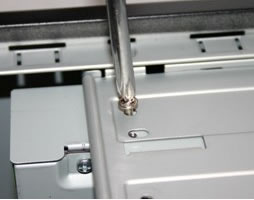 opticaldrive
Tip: When installing multiple optical drives take care of jumper settings. Make sure you make one as primary and other slave by using the jumper. This is not applicable if the drives are SATA drives.
Step 9: Connecting various cables.
- First we will finish setting up internal components and then get on to the external ones. You will need to consult your motherboard manual for finding the appropriate port for connecting various cables at the right places on the motherboard.
- • Connect the large ATX power connector to the power supply port on your motherboard
- • Next get hold of the smaller square power connector which supplies power to the processor and connect it to the appropriate port by taking help from your motherboard manual
- • Connect the cabinet cables for power,reset button in the appropriate port of the motherboard
- • Connect the front USB/audio panel cable in the motherboard
- • Plug the cable of cabinet fans
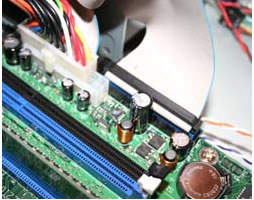 pccables
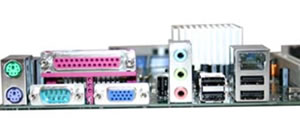 vgacardholder
- You are done with installing the internal components of the PC. Close the side doors of the cabinet and get it upright and place it on your computer table. Get the rest of the PC components like monitor, keyboard, mouse, speakers etc. which we will connect now.
- • Connect the VGA cable of the monitor into the VGA port
- • If mouse/keyboard are PS/2 then connect them to PS/2 ports or else use the USB port
- • Connect the speaker cable in the audio port
- • Plug in the power cable from PSU into the UPS
- • Also plug in the power cable of the monitor
- You are now done with setting up your PC. Power on and see your rig boot to glory.
Step 10: Installing the OS and drivers.
We are done with the hardware part. Now get your favorite OS disks ready and the CD that came with your motherboard.
- Set the first boot device to CD/DVD drive in BIOS
- · Pop in the OS disk
- · Reboot the PC
- · Install the OS
- · Install drivers from motherboard CD (applicable only to Windows OS)
- Voila! You have your PC up and running. Enjoy your journey with your self assembled rig!
Jargon Buster
- CPU - Central Processing Unit
- • RAM - Random Memory Access
- • DDR -Double Data Rate
- • SDRAM - Synchronous Dynamic Random Access Memory
- • PSU -Power Supply Unit
- • AGP - Accelerated Graphics Port
- • PCI-E - Peripheral Component Interconnect- Express
- • SATA - Serial Advanced Technology Attachment
- • PATA -Parallel Advanced Technology Attachment
- • IDE - Integrated Drive Electronics
- • ATX - Advanced Technology Extended
- • USB - Universal System Bus
- • VGA - Video Graphics Array
- • PS/2 - Personal System/2
- • OS - Operating System