Howto configure Microsoft Outlook 2010
4th May 2016 | category: Emails | Hits: 852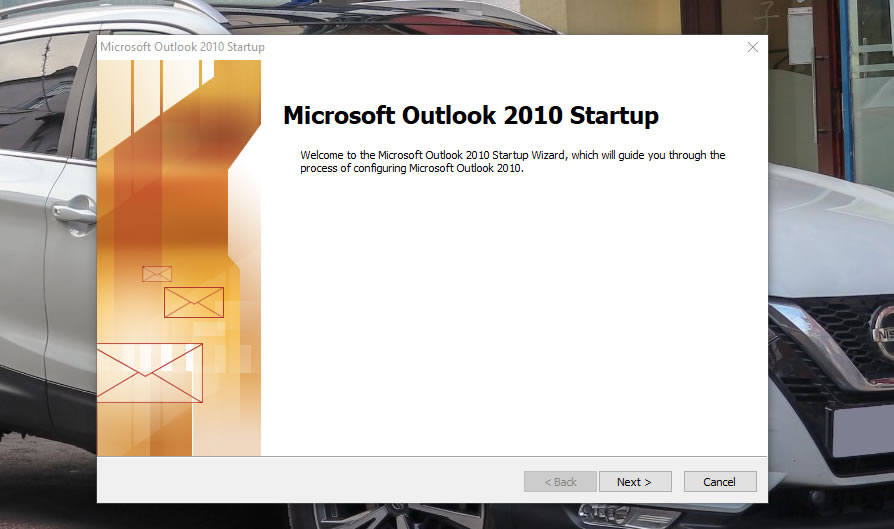
Now that everyone are relaying on mobile devices to check emails. We still obliged to get you around Microsoft outlook 2010 as we did for Ms Outlook 2003 and Ms Outlook 2007.
STEP 1:
Where to find Microsoft outlook 2010
Go to START button icon -> scroll to Microsoft Office ->then click on Microsoft Outlook 2010. Alternatively you can just click on Start button and then search using the search bar just close to the start button.
If it is the first time to do click on it it will take you to an interface as shown in image below.
For those with already configured outlook open it and click on Home then settings -> Account settings
STEP 2:
Click Next from the screen above, choose Yes to configure Outlook to your email account or Google, or any other email server you have in place. Click Next.
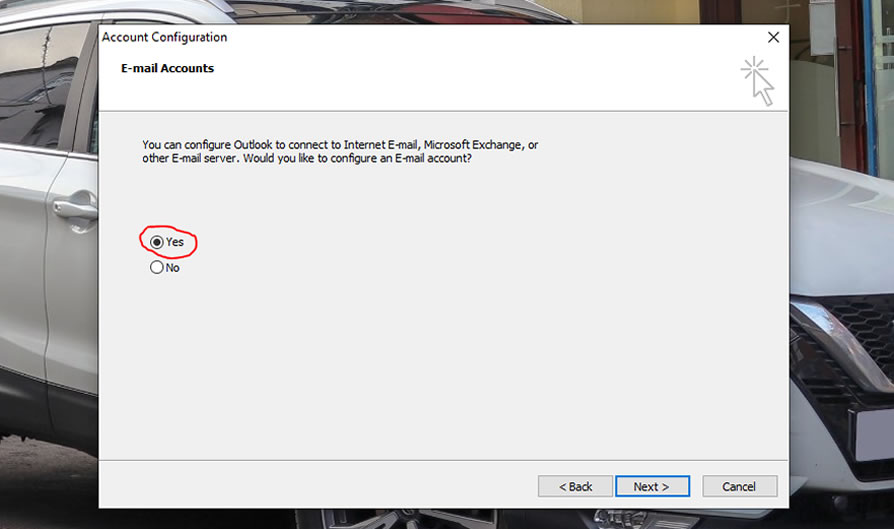 Email Accounts
STEP 3:
Here add in your email details and choose option of "Manually configure server settings or additional server types". Reason of the manual option is to enter in your server details directly otherwise if your configuring your gmail or outlook email in here, then continue with automatic option.
NOTE: You must clearly know your email details or contact your service provider before start the configuration process.
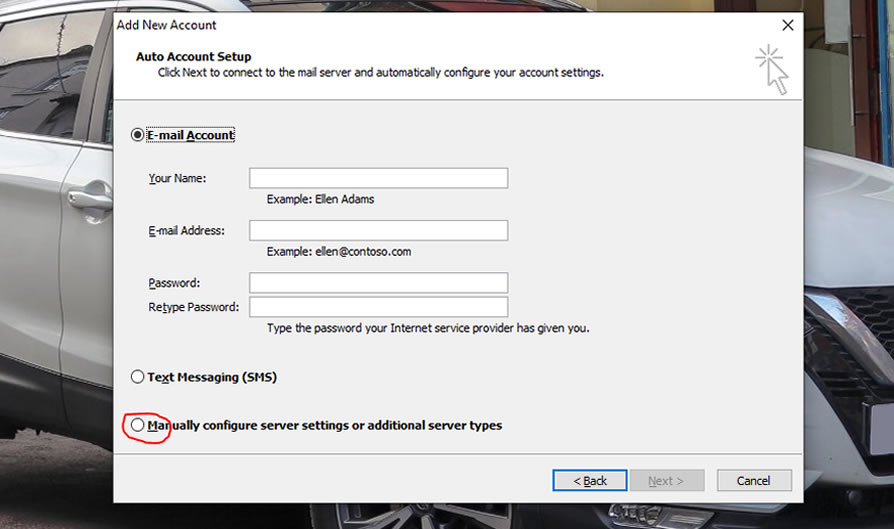 Manually configure outlook
On clicking Next, maintain option "Internet Email" and again click on Next
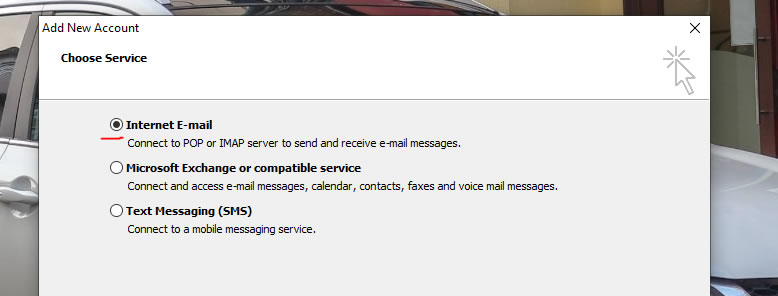 Select Internet Email
STEP 4:
This stage is very crucial. You must enter the correct details are received from your administrator or service provider that is Server information (incoming and outgoing server name), User information (full email and password). Then also making a choice of either to use POP3 or IMAP
Brief here
POP3 downloads the email from a server to a single computer, then deletes the email from the server. On the other hand, IMAP stores the message on a server and synchronizes the message across multiple devices.
My recommendation:
I will recommend IMAP if your internet is stable and you will want to see your sent items across multiple devices. For those with just outlook and slow internet POP3 is for you. We will configure to leave a copy on server at later stage.
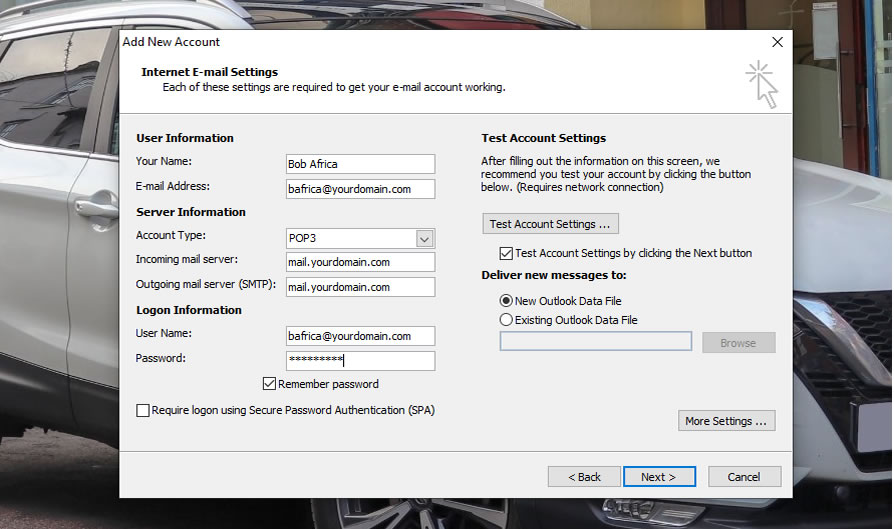 use POP3 or IMAP
NOTE: Details used here are just for sample purposes. Replace Name, Incoming Server, Outgoing Server, Username and Password to your prefferred details.
WAIT! - you will need to click on "More Settings" to configure under Tabs; Outgoing Server and Advanced.
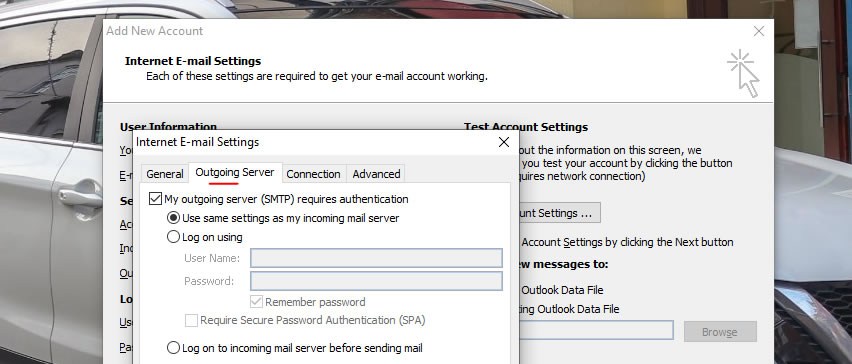 "More Settings"
Under Outgoing Server tab - tick "My outgoing server (SMTP) requires authetication" and leave it in Use same settings as my incoming mail server option.
Under Advanced Tab - setup the port numbers.
Recommendation: Use encrypted connection (SSL) settings for both incoming and outgoing server details as shown in illustration below.
POP3 Port: 995
IMAP Port: 993
SMTP Port: 465
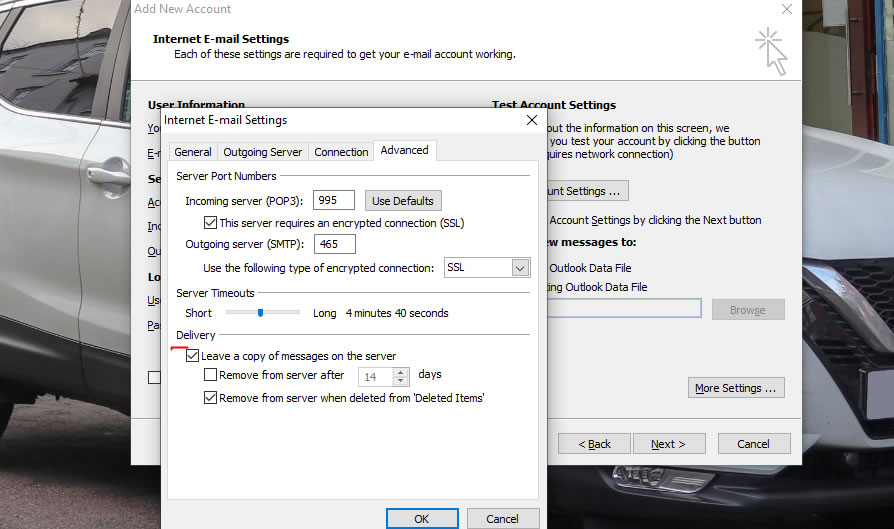 Server Setting Ports
NOTE: Always tick the option of Leave a copy of messages on the server with either POP3 or IMAP settings to help you have a backup of your emails incase of any disastater.
Click OK to get out of more settings section. Then click Next to test your account to see if all is good.
And Finally
if all is fine. You will be lead to the Congratulation screen below.
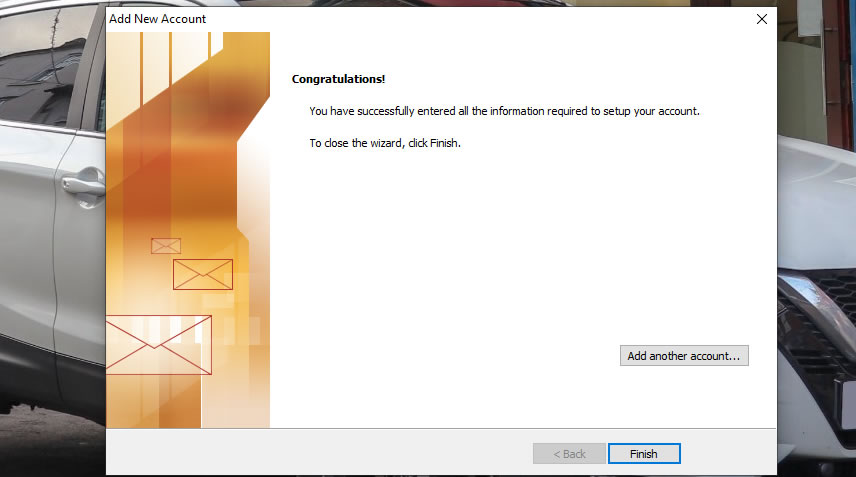 click Finish
Click Finish to start accessing your emails.
Always seek help where you find challenges.