How to create new custom widget positions in WordPress using “functions.php” file.
28th Sep 2019 | category: Web Design and Development | Hits: 1446
We well know that most of the templates in WordPress give us limited widget positions, as a developer one could really do a lot if the widget positions in WordPress were not that restricted. Most WordPress templates come with the Main sidebar and a few sidebars. Today I will show you how you create your own widget positions in a much faster an easier way.
For the purpose of this tutorial we will create a widget position called “New positions”. Let’s dive in . . .
Step One: Locate the functions.php
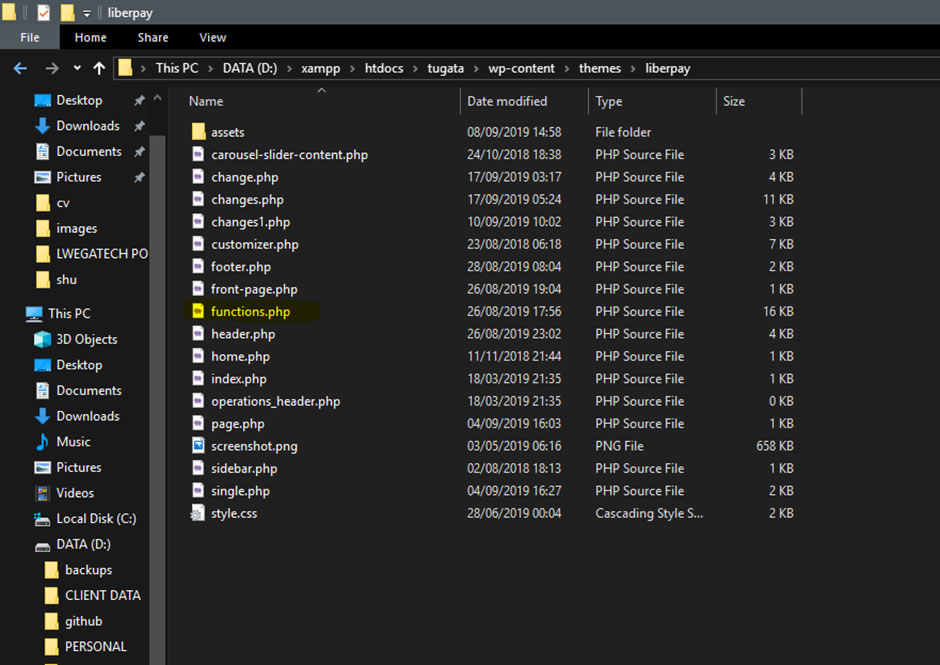
In your template files, locate the functions.php file and open it with your favourite text-editor, I recommend using Vscode.
 Locate functions.php file
Step Two: Locate the function yourtheme_register_sidebars()
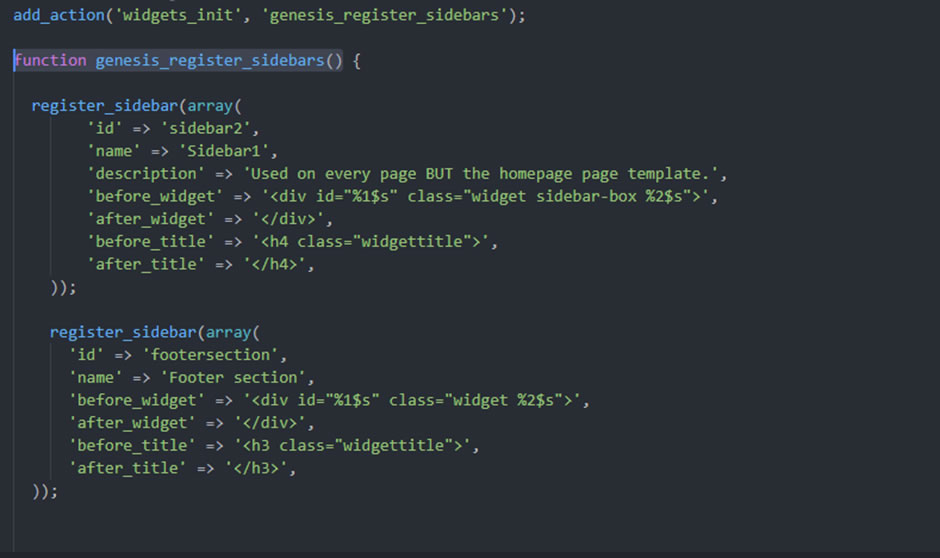
Once the functions.php file is open you can now locate the function genesis_register_sidebars() Its in this function that we will create the widget position.
 create the widget position
To create the “new positions” widget position use the following code and then save.
 Custom Widget
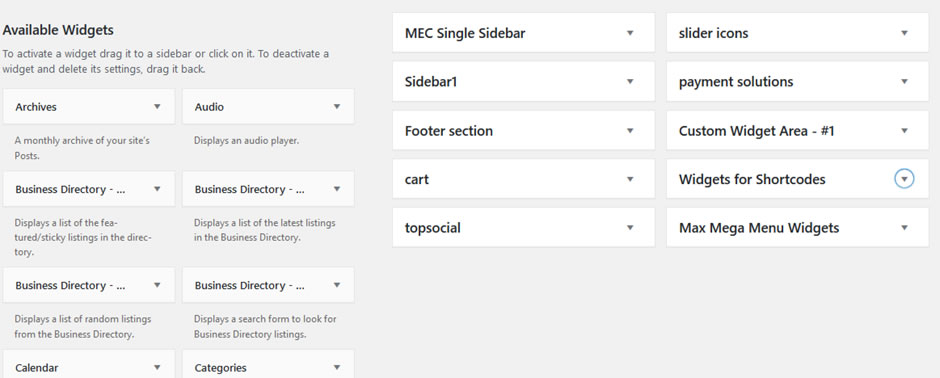
Once you have saved the code, you can now refresh the widgets page in WordPress dashboard and the widget position will now be displayed.
 widgets page