How to install Microsoft office picture manager in windows 10
4th Feb 2018 | category: Software | Hits: 1274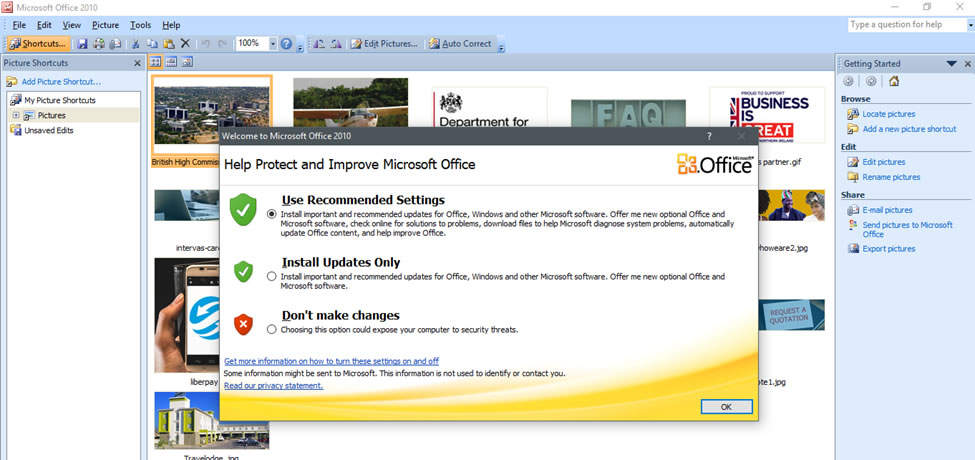
By default, Microsoft office packages from 2013 to latest do not come with Microsoft picture manager installed by default, you need to install it as a stand-alone application.
Microsoft Office Picture Manager allows you to have a flexible way to manage, edit, and share your pictures. You can perform many operations on your images including editing, resizing, sharing, searching and also perform auto correction on your images.
Microsoft Office Picture Manager comes in handy especially when you want to do batch edits on your images.
Enough of the chit chat let get into action….
Step one
Download Microsoft Share point designer 2010 by opening Google search engine and typing “Microsoft Share point designer 2010” into the search box, this will bring your two versions of Microsoft Share Point designer 2010 and that is 32 bit and 64 bit, it’s from here that you select the right version for your computer.
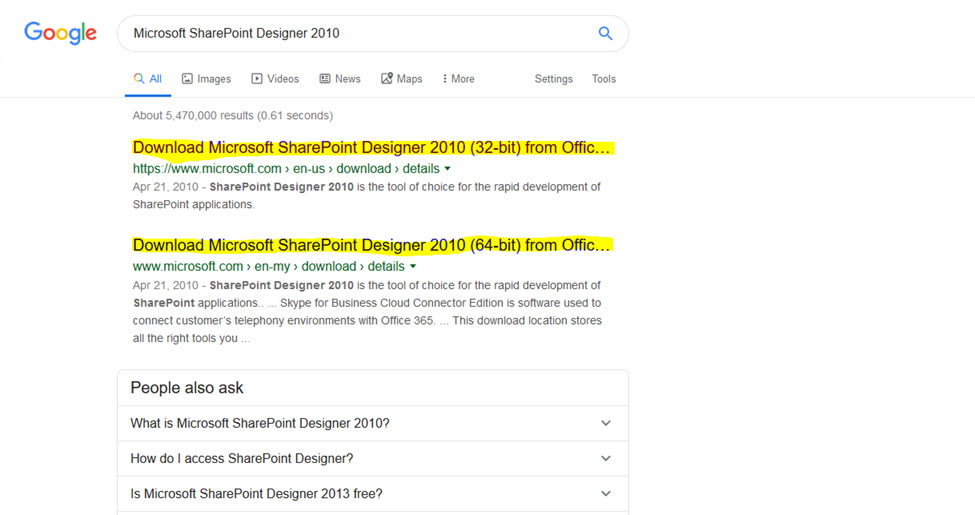 Google search results for Microsoft SharePoint designer
Step two
Once the download is done run the exe application and wait until the file extraction is complete
 exe application
Step three
Select CUSTOMIZE from the choose installation you want popup
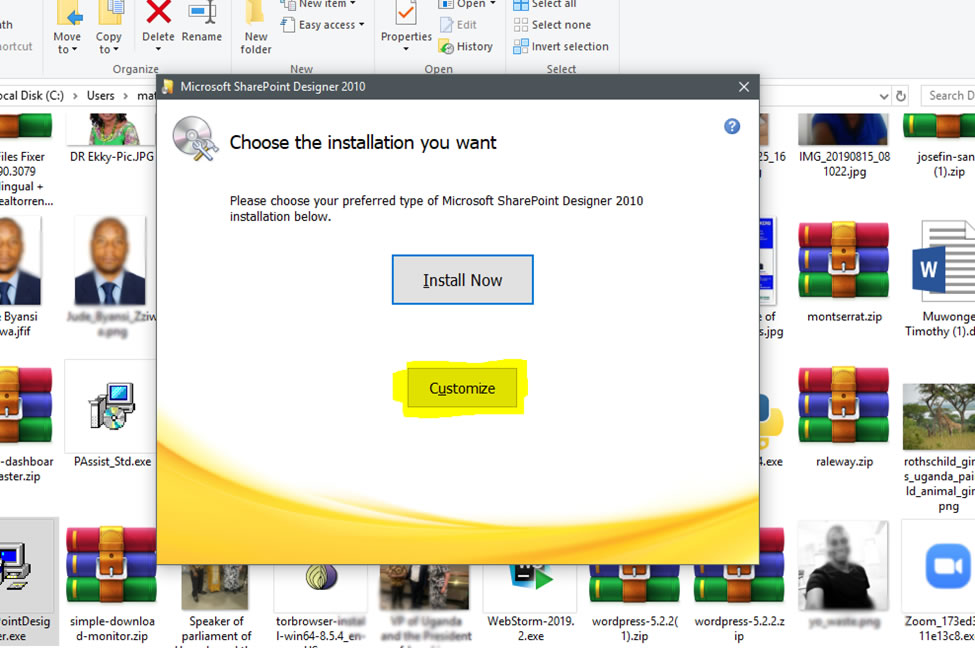 Select CUSTOMIZE
Step four
Make sure all the three tools of share point designer are marked as unavailable from their respective drop downs
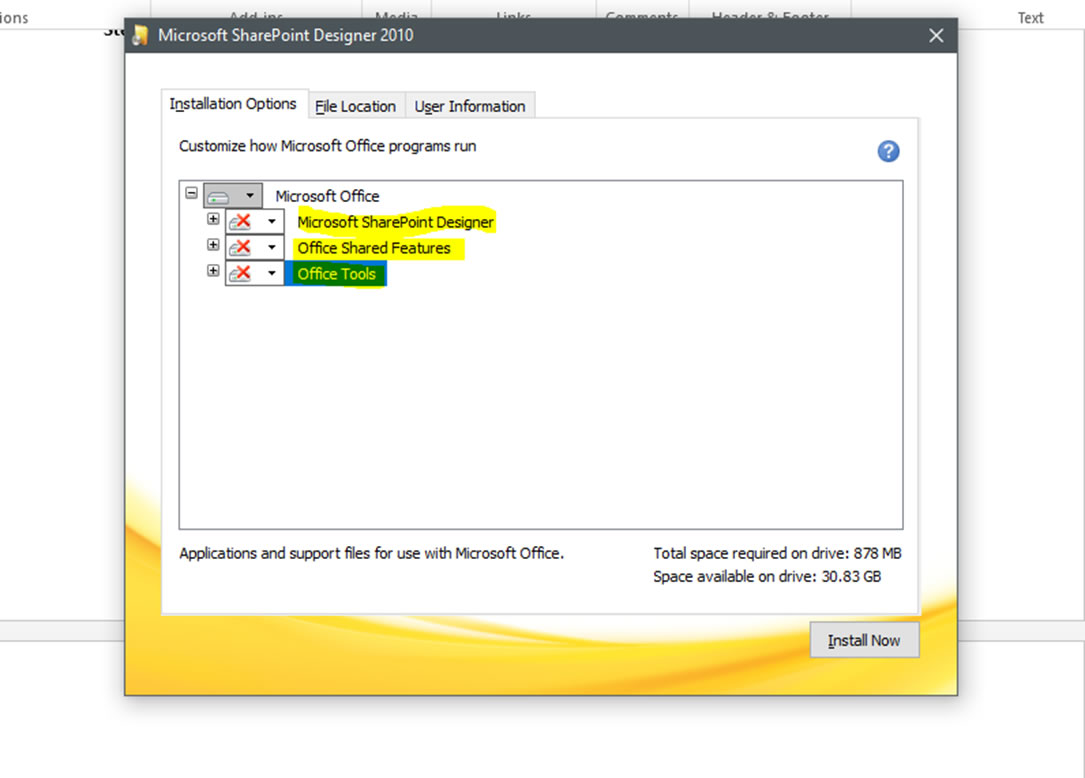 share point designer
Step five
Expand Office Tools and select Microsoft Office Picture Manager, Click the drop-down arrow next to Microsoft Office Picture Manager and click Run from my computer.
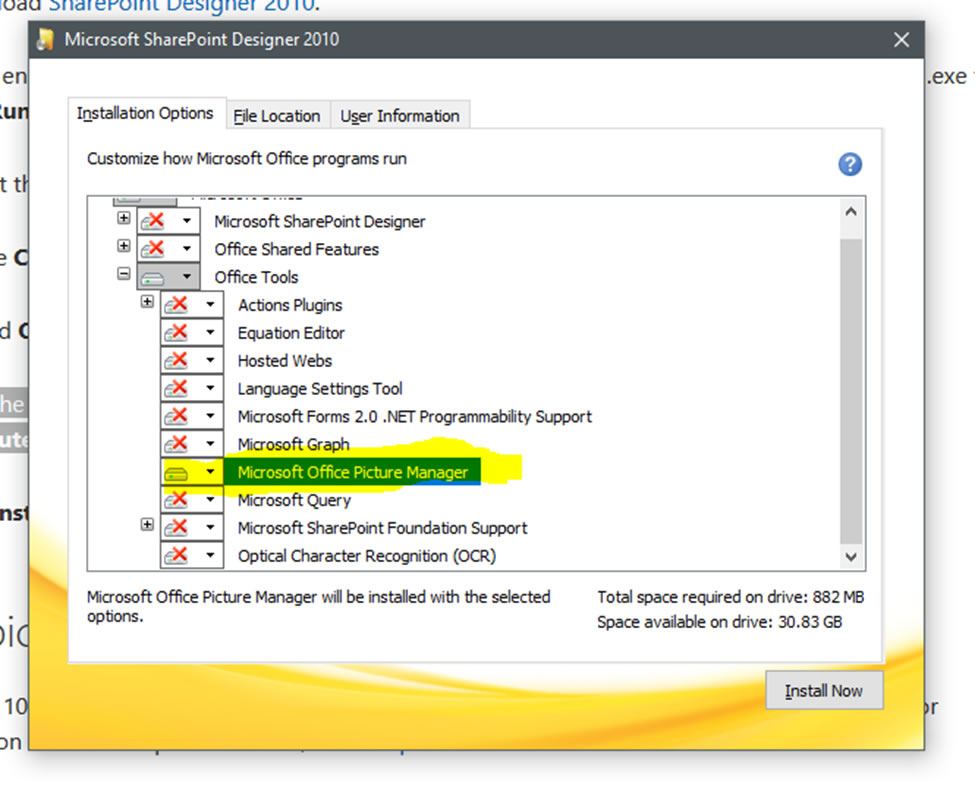 Expand Office Tools and select Microsoft Office Picture Manager
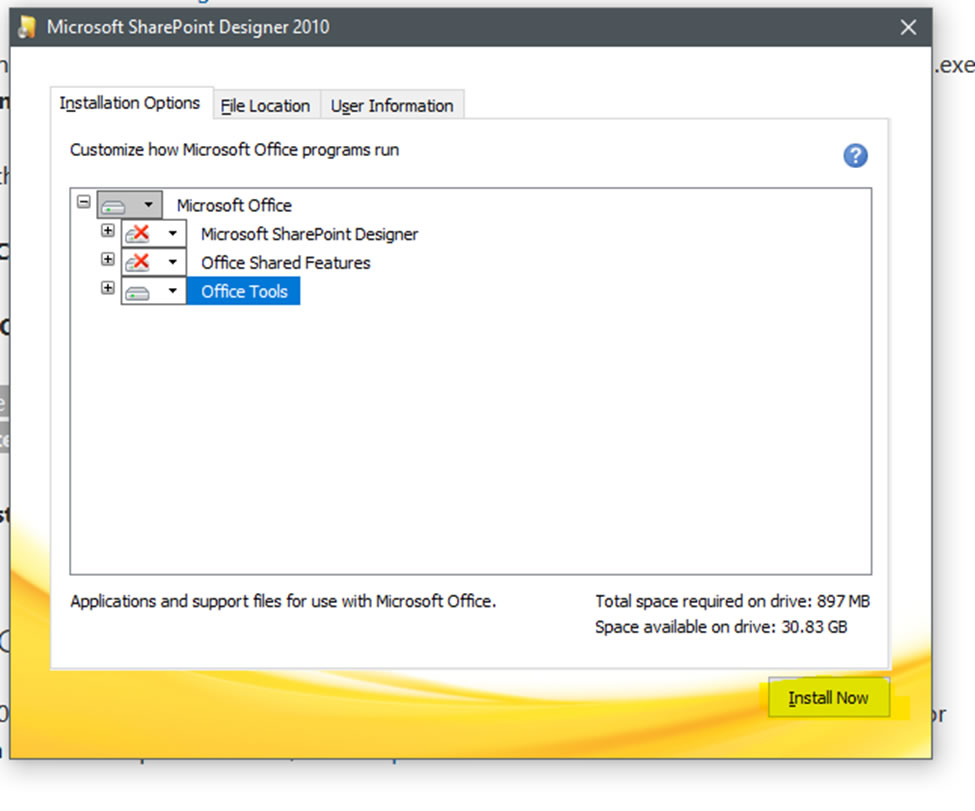 Final Step
Click install now and this will only install Picture manager without other components that you may not need anyway. After the installation is done, you can restart your computer and start using Microsoft picture manager.